

Did you know that water heating accounts for about 18 percent of your home’s energy use? Choosing and installing the right water heater can lower your utility bills and keep your showers comfortable year-round. If you skip a crucial step or overlook safety guidelines, you might face expensive repairs or even local code violations. A smart start ensures safe installation, steady performance, and savings that add up month after month.
Table of Contents
- Step 1: Assess Your Water Heater Needs And Local Codes
- Step 2: Prepare The Installation Area And Gather Tools
- Step 3: Disconnect And Remove The Old Water Heater
- Step 4: Install The New Water Heater Safely
- Step 5: Test For Leaks And Verify Proper Operation
Quick Summary
| Key Point | Explanation |
|---|---|
| 1. Assess water heater needs | Evaluate your household’s hot water demand and local regulations to choose the right unit. |
| 2. Prepare installation area | Clear the workspace, gather essential tools, and ensure safety measures are in place. |
| 3. Disconnect the old unit | Safely shut off power and water supply before draining and removing the existing water heater. |
| 4. Install new water heater | Position the new heater correctly, ensuring all connections are secure and leak-free. |
| 5. Test for leaks and operation | Fill the tank, check all connections for leaks, and verify the system operates correctly. |
Step 1: Assess Your Water Heater Needs and Local Codes
Choosing the right water heater requires careful evaluation of your household requirements and understanding local regulations. This initial assessment helps ensure you select a water heating solution that delivers reliable performance while staying compliant with regional building standards.
Start by calculating your home’s hot water demand. Measure the number of bathrooms, appliances, and typical simultaneous water usage to determine the appropriate tank size or flow rate for tankless systems. According to the U.S. Department of Energy, factors like family size and peak hot water consumption will guide your selection.
Next, investigate your local building codes and permit requirements. Different municipalities have specific regulations about water heater installations, including placement, ventilation, and safety standards. Research from energy experts emphasizes the importance of checking zoning ordinances and subdivision covenants before proceeding with installation.
Consider your fuel options carefully. Natural gas, electric, propane, and solar water heaters each offer unique benefits. Evaluate your existing infrastructure, energy costs, and efficiency ratings to make an informed decision. Look for Energy Star certified models that can provide long term savings and reduce environmental impact.
Here’s a quick comparison of common water heater fuel types and their key characteristics:
| Fuel Type | Typical Efficiency | Install Cost | Key Advantages |
|---|---|---|---|
| Natural Gas | High | Moderate | Fast heating Lower energy cost |
| Electric | Moderate | Low | Easy install Quiet operation |
| Propane | High | Higher | Off-grid option Consistent supply |
| Solar | Very High | Highest | Renewable energy Long-term savings |
Pro Tip: Always consult a licensed professional who understands local codes and can help you navigate complex installation requirements.
With your needs assessed and local regulations understood, you’re now prepared to move forward with selecting the perfect water heater for your home. The next step involves choosing a specific model that matches your research and budget constraints.
Step 2: Prepare the Installation Area and Gather Tools
Successful water heater installation starts with meticulous preparation of your workspace and gathering the right equipment. This critical step ensures safety, efficiency, and smooth progress throughout the installation process.
According to NACHI, your installation area requires careful preparation. Clear the space completely, removing any clutter, debris, or potential obstacles. The designated area should provide ample working room and be located in a well-ventilated space away from high traffic zones.
Gather your installation toolkit before beginning. Essential tools include adjustable pipe wrenches, tube cutters, tape measure, level, safety glasses, work gloves, and a voltage tester for electrical connections. Maryland Labor Safety Guidelines recommend having fire extinguisher and first aid kit nearby as additional safety precautions.
Check your workspace thoroughly. Ensure proper ventilation and remove any flammable materials within a safe radius of the installation zone. Verify that electrical outlets and gas connections meet manufacturer specifications and local building codes.
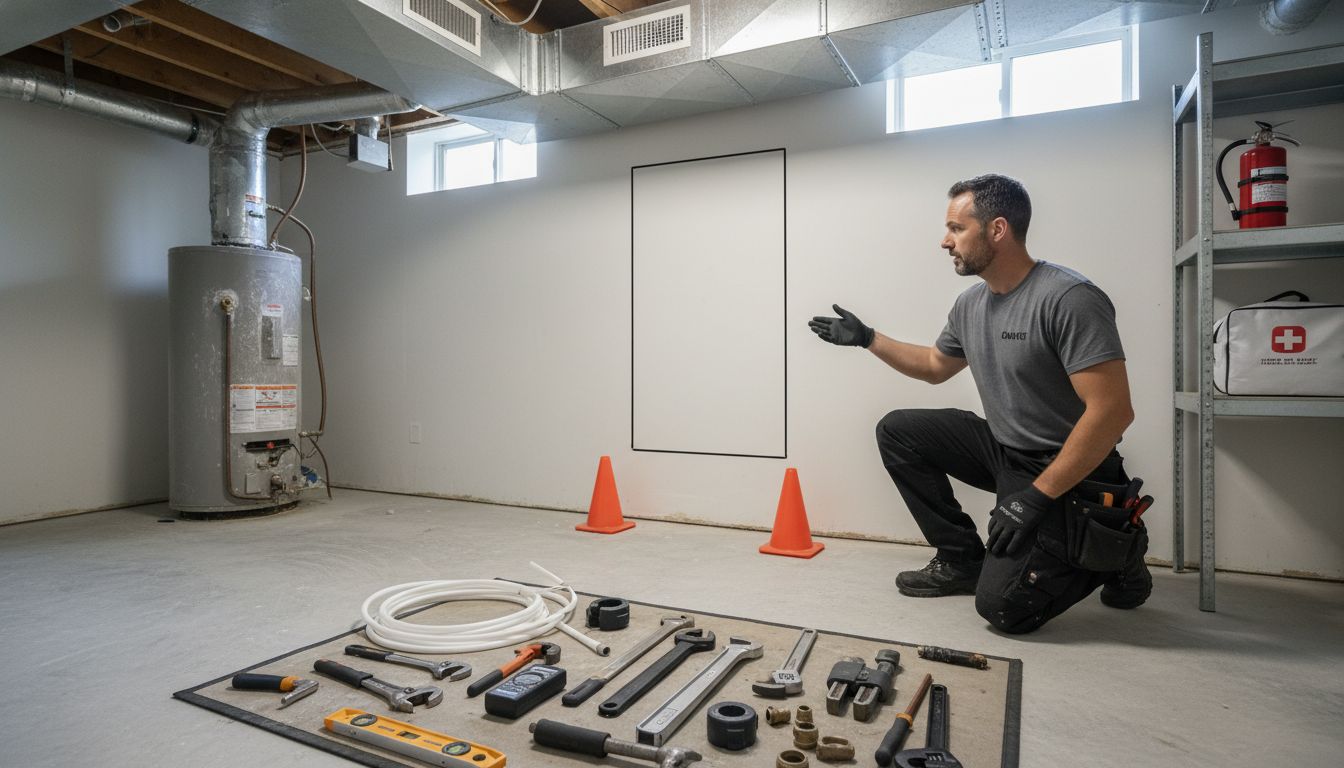 Measure the designated space to confirm your new water heater will fit comfortably with required clearance around all sides.
Pro Tip: Take photos of your existing setup before disconnecting anything. These can serve as helpful reference points during installation.
With your workspace prepared and tools assembled, you are now ready to begin the precise work of water heater removal and new unit installation. The next step involves carefully disconnecting your existing water heater and preparing for the new system.
Step 3: Disconnect and Remove the Old Water Heater
Removing an existing water heater requires careful preparation and systematic disconnection to ensure safety and prevent potential damage. This step demands precision and careful attention to multiple critical details.
NACHI safety guidelines emphasize the importance of shutting off power and water supply before beginning disconnection. Start by switching off the circuit breaker for electric water heaters or closing the gas valve for gas models. Next, turn off the cold water inlet valve to prevent additional water from entering the tank.
Drain the water heater completely to reduce weight and minimize potential spillage. Connect a garden hose to the drain valve located at the bottom of the tank. Run the hose to a floor drain or outside area where water can safely discharge. Open the drain valve and allow the tank to empty completely. This process might take 30 to 45 minutes depending on tank size.
After draining, disconnect electrical or gas connections carefully. For electric models, disconnect wiring using appropriate wire strippers and protective gear. Gas water heaters require disconnecting the gas line and removing the vent pipe. Maryland Labor Safety Guidelines recommend checking the thermometer and safety valve functionality before full disconnection.
Pro Tip: Take photos of existing connections before removing anything to ensure correct reinstallation of your new unit.
With the water heater drained and disconnected, you are now prepared to physically remove the old unit and make way for your new water heating system. The next step involves carefully lifting and removing the water heater from its current location.
Step 4: Install the New Water Heater Safely
Installing your new water heater requires precision and careful attention to detail. This critical step will ensure reliable hot water delivery and prevent potential safety issues in your home.
U.S. Department of Energy recommends selecting a water heater that matches your household hot water demands and energy efficiency goals. Position the new unit exactly where the old water heater was located ensuring proper clearance and ventilation around all sides.
Begin by carefully positioning the water heater and connecting water supply lines. For gas models, ensure proper gas line connection and verify no leaks are present. Electric models require precise electrical connection matching existing wiring specifications. According to NACHI safety guidelines, install the temperature and pressure relief valve with a drain pipe extending to within 6 inches above the floor to ensure critical safety protection.
Connect the water inlet and outlet pipes securely using appropriate fittings. For gas water heaters double check the vent pipe installation ensuring it maintains proper slope and connections. Verify all connections are tight and properly sealed to prevent potential leaks or gas escape.
Pro Tip: Always use thread seal tape or pipe compound on threaded connections to create a watertight seal and prevent potential leakage.
With the new water heater securely installed and all connections verified, you are now ready to test the system and ensure everything functions correctly. The next step involves carefully refilling the tank and checking for any potential issues.
Step 5: Test for Leaks and Verify Proper Operation
After installation, thoroughly testing your new water heater ensures safe and efficient performance. This critical step helps identify any potential issues before they become costly problems.
NACHI inspection guidelines recommend a comprehensive operational test immediately following installation. Begin by slowly filling the tank with water and checking all connections for potential leaks. Open a hot water faucet to release air from the system and confirm steady water flow.
For gas water heaters, carefully light the pilot and observe the flame color. A steady blue flame indicates proper combustion. Electric models require checking electrical connections and verifying no exposed wiring. Maryland Labor Safety Guidelines emphasize the importance of maintaining a detailed log documenting initial setup and any observations during first operation.
Carefully inspect the temperature and pressure relief valve for proper function. Listen for any unusual sounds and watch for consistent water temperature. Check around all pipe connections and the tank base for any signs of water seepage or moisture accumulation. Pay special attention to gas line connections and electrical wiring to ensure everything remains secure.
Pro Tip: Run a complete hot water cycle and monitor the system for at least 30 minutes to confirm stable performance and identify any potential early warning signs.
With your water heater thoroughly tested and functioning correctly, you have successfully completed the installation process. The final step involves cleaning your workspace and preparing for ongoing maintenance to ensure long term reliability.
Simplify Your Water Heater Installation with Trusted Experts
Installing a new water heater can feel overwhelming when you face complex local codes, safety checks, and precise connections. This guide highlights how critical steps like assessing household needs, preparing the installation area, and safely connecting gas or electric lines can make or break your success. Avoid common pitfalls such as improper venting or missed leak testing by partnering with experienced professionals who understand these challenges.

Take control of your home’s comfort today by choosing the team that combines expert knowledge with reliable service. At North End Plumbing, Heating & Air, we specialize in seamless water heater installations that meet local regulations and your unique needs. Visit our Info & Education section to learn more about maintaining your system or explore our full range of plumbing solutions on our website. Let us help you enjoy worry-free hot water by scheduling a consultation now.
Frequently Asked Questions
What should I consider when assessing my water heater needs?
Begin by calculating your home’s hot water demand. Measure the number of bathrooms and appliances, as well as typical simultaneous water usage, to determine the right tank size or flow rate for tankless systems.
How do I check local building codes for water heater installation?
Research your local building codes to understand permit requirements and safety standards. Look into zoning ordinances and any subdivision covenants to ensure compliance before proceeding with your installation.
What tools do I need to prepare for water heater installation?
Gather essential tools such as adjustable pipe wrenches, tube cutters, a tape measure, and a voltage tester. Ensure your workspace is safe by keeping a fire extinguisher and first aid kit nearby to handle any potential emergencies.
How do I safely disconnect and remove the old water heater?
Start by shutting off the power or gas supply, and turn off the cold water inlet valve. Drain the tank completely through a connected garden hose, then disconnect electrical or gas connections carefully to prevent spills and hazards.
What steps should I follow during the installation of a new water heater?
Position your new water heater in the same location as the old unit, ensuring proper clearance and ventilation. Connect the water supply lines, secure any electrical or gas connections, and install the temperature and pressure relief valve with a drain pipe for safety.
How can I test my new water heater for leaks and proper operation?
After installation, slowly fill the tank with water and check all connections for leaks. Open a hot water faucet to release air, and observe the operation for at least 30 minutes to confirm stable performance without unusual sounds or moisture accumulation.
Recommended
- Why Upgrade Water Heater: Complete Guide for Homeowners – North End Plumbing, Heating and Air
- Water Heater Flushing: Complete Guide to Key Benefits – North End Plumbing, Heating and Air